How to Setup Login Verification in Twitter
Lawrence Abrams
- May 4, 2018
- Read 80,330 times
To increase security, Twitter offers a feature called Login verification, which is their version of two-step verification. With Login verification enabled on an account, a user will not only need their password to login, but will also require a code sent to your mobile number at the time of the login.
This extra layer of security protects you from attackers brute forcing your password as they would still need the code sent to your mobile number. Therefore, the only way the way could login to your account would be not only have your password, but also to have access to your mobile device as well.
In summary to setup Login verification in Twitter, you would do these steps:
- Login to Twitter and go into the Account Settings.
- Click on "Set up Login Verification"
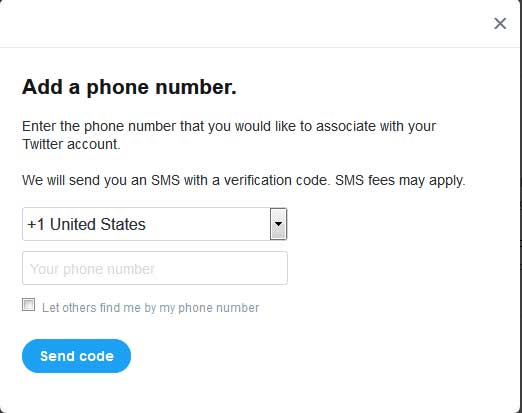
- Click "Start" and then enter your mobile phone if requested.
- After entering your number, Twitter will now want to send a code to your mobile phone to configure it for Login verification. At this screen click on "Send Code".
- A code will have been sent to your mobile number as a text. Enter the code you received and press "Submit".
- You will now be enrolled in Login Verification.
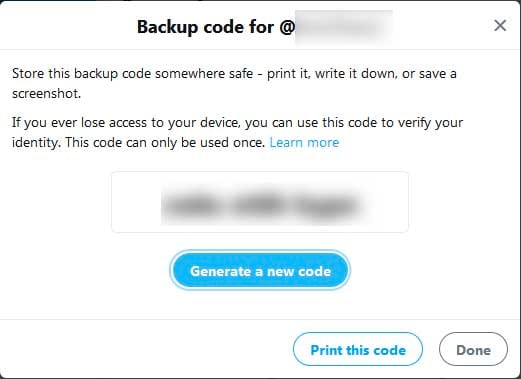
- Twitter will now prompt you to generate a backup code. Click on the "Get Backup Code" button and then write down or print the code that is displayed. This code can be used once to bypass Login verification.
Below are these same steps in more detail.
Setting up Login Verification in Twitter
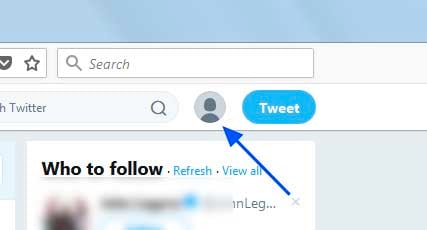
To setup Login verification in Twitter, a user should open their user menu by clicking on their profile picture in the upper right part of the Twitter screen.
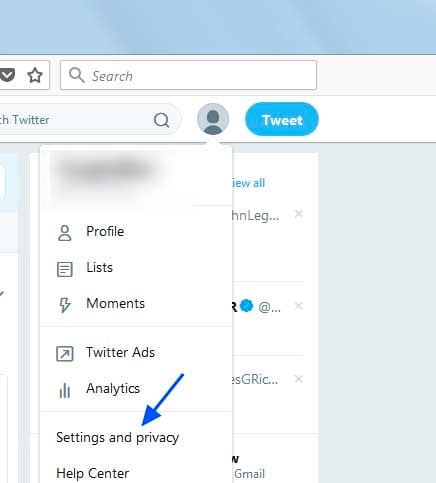
When the user menu opens, scroll down and click on the "Settings and Privacy" link.
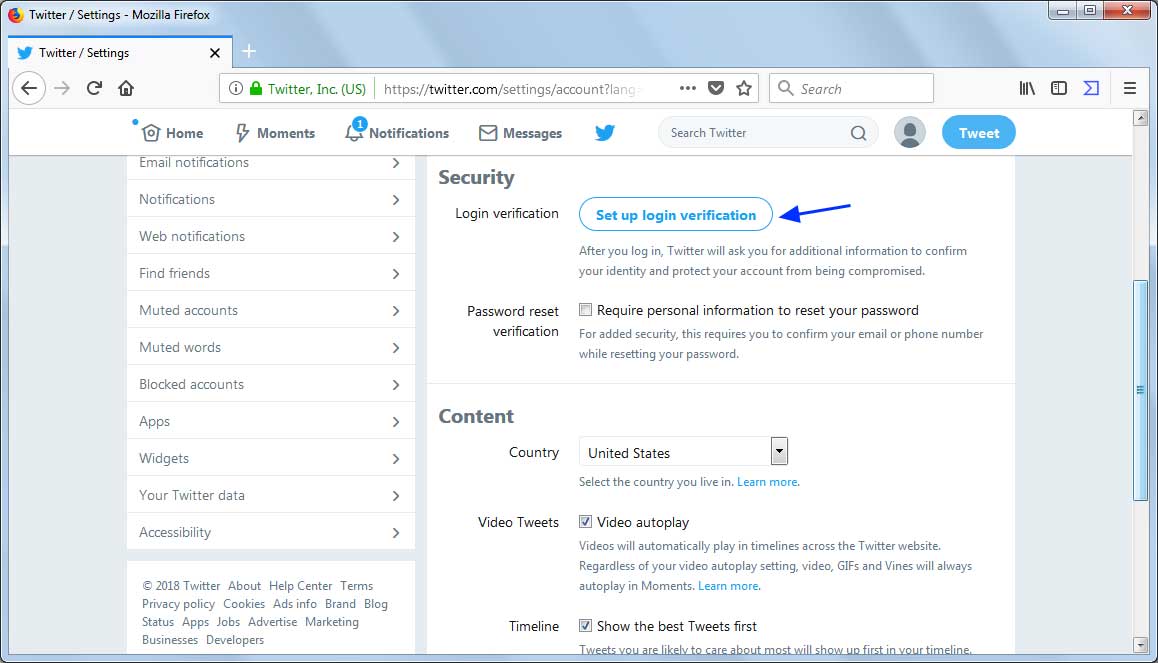
When the settings section opens, you will automatically be in the Account settings screen. Scroll down till you see the "Set up login verification" button and click on it.
You will now be shown a screen where you will be walked through setting up Login verification.
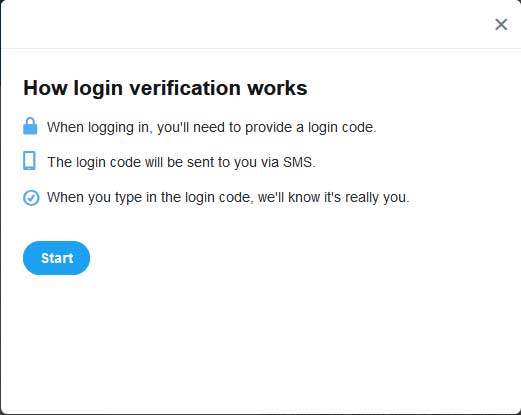
Click on the "Start" button to begin. First, you will be asked to enter your password to verify that you are the owner of the account. Enter your password and click on the "Verify" button.
If you do not already have a mobile number associated with your account, you will now be asked to enter one. Enter your phone number and then click on "Send Code".
Twitter will then display a screen asking you to enter the code that was just sent to the phone number you submitted.
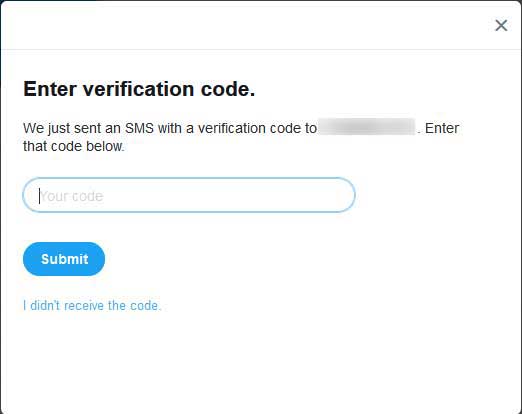
Once you enter the code, you will become enrolled in login verification.
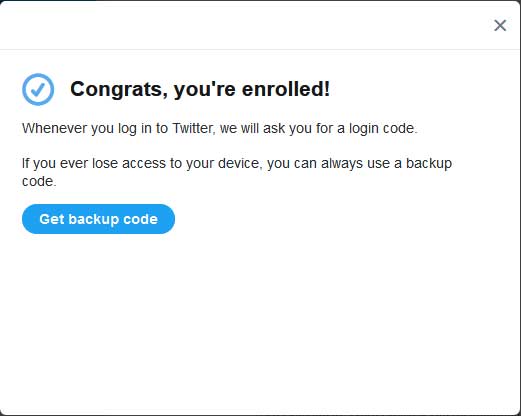
Now every time you log into Twitter, a code will be sent to your mobile phone to confirm your identity. As a last step, Twitter wants you to a generate backup code, which is a one-time use password you can enter to bypass Login verification and get back into your account in the event you lose your phone.
To get this backup password, click on the "Get backup code" button. When you are done saving or printing your code, you can click on the "Done" button.
Login verification is now configured and every time you login to Twitter, you will receive a text on your associated mobile phone. This text will contain a code that you will need to enter along with your password to gain access to your Twitter account.
Now that Login verification is configured, you can take it a step further and have these verification codes generated using a 3rd party application such as Google Authenticator, Authy, or Microsoft Authenticator. Setting this up is explained in the next section.
Using Twitter Login Verification with a 3rd Party Authenticator
Instead of having your Login verification codes sent to your mobile number, you can also use a 3rd party authentication app such as Google Authenticator (Android | iOS), Authy (Android | iOS), or Microsoft Authenticator (Android | iOS). Make sure you download one of these apps before proceeding. Personally, I prefer Google Authenticator, but any of the above will work.
To setup a 3rd party authenticator, go back into your Account Settings as described above and you will now see a button labeled "Review your login verification methods".
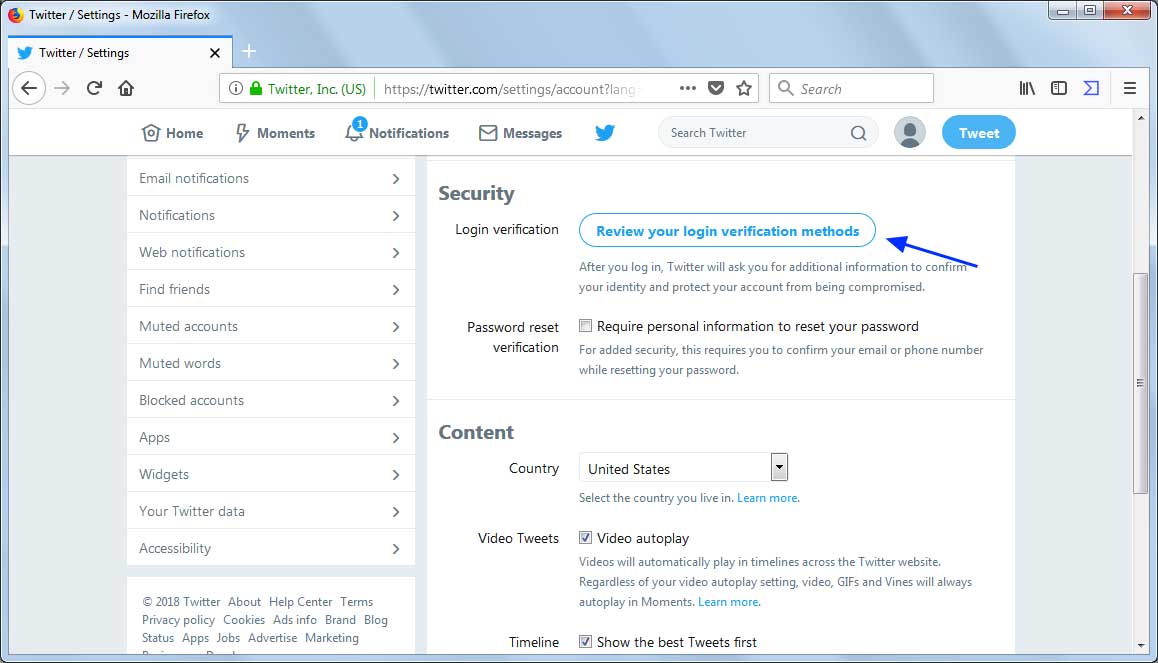
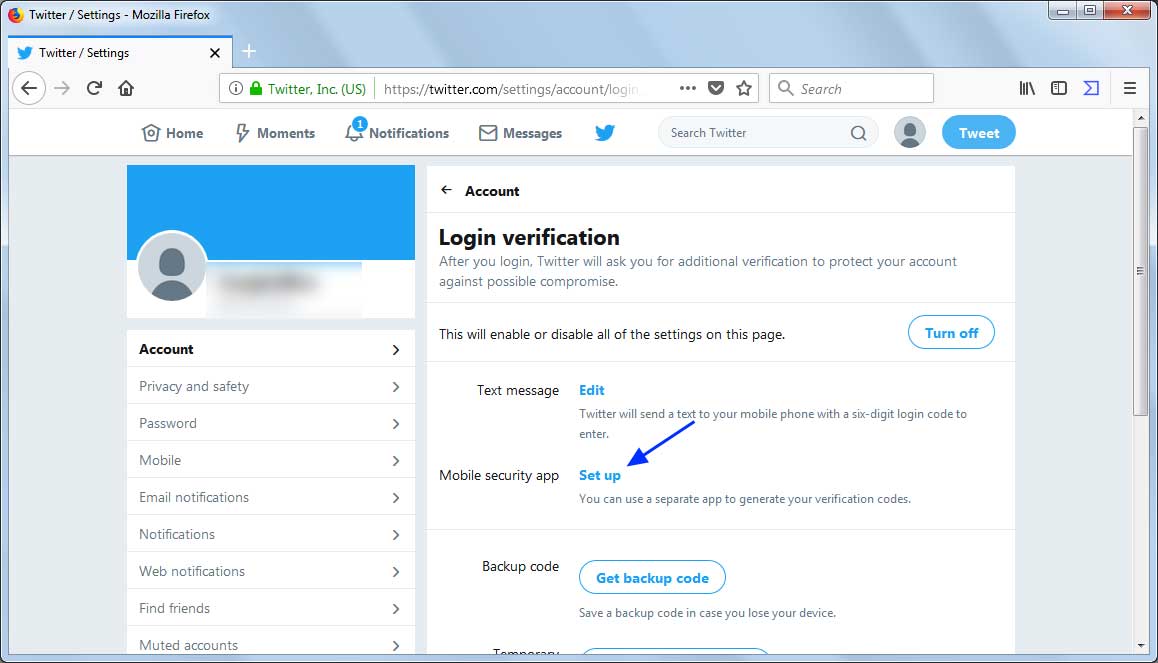
Click on this button and you will be brought to a screen where you can modify the Login verification configuration. Click on the "Set up" link next to the "Mobile security app" label.
You will now be presented with a tutorial showing how to setup your 3rd party authenticator.
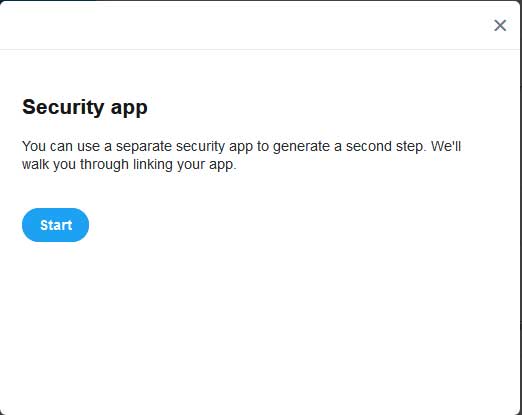
Once you click on the "Start" button you will be shown a QR code that you need to scan with your authenticator.
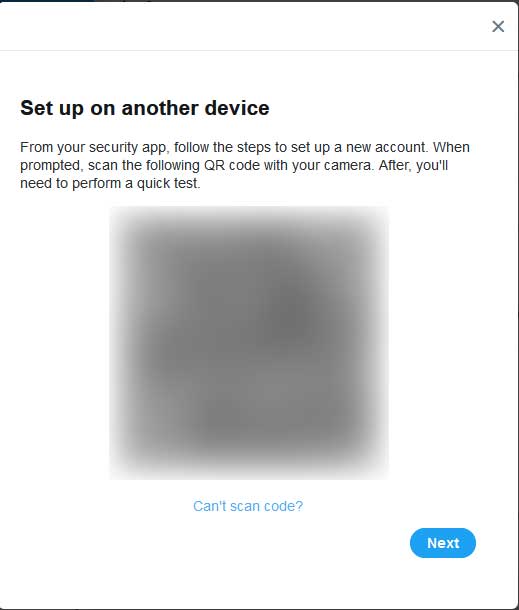
Once you scan the code, the account will be added to your authenticator app and begin to display verification codes. Twitter will then prompt you to enter the code shown on your authenticator app in order to verify it was configured correctly.
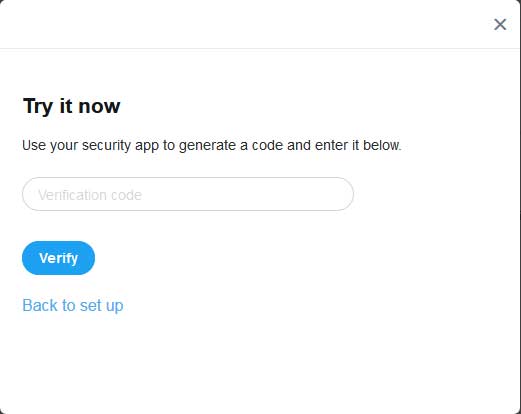
If you enter the correct code, Twitter will state that your authenticator app's verification codes can now be used when you login.
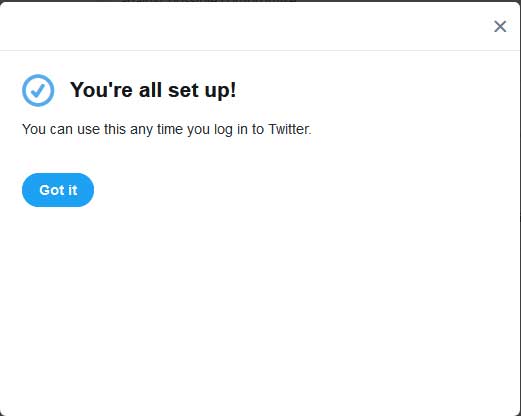
Twitter is now configured to use a 3rd party authenticator for Login Verification.


