Introduction
In the past malware infections typically consisted of worms, trojans, backdoors, and viruses that were easily detected, and for the most part, removed. To make an anti-virus program's job more difficult, an increasingly popular tactic for malware developers is to use a type of computer infection or technology called rootkits. Rootkits are computer infections that hijack your operating system so that it does not properly report the existence of other malware files, Windows Registry entries, and to make it more difficult to detect other computer infections that it may be protecting.
Malwarebytes Anti-Rootkit, or MBAR, is a rootkit scanner that searches your computer for rootkits and then removes them. Once Malwarebytes Anti-Rootkit removes the rootkit, any files or Windows Registry entries that the rootkit was hiding will then be visible and be easier to remove.
MBAR has the ability to target rootkits that belong to the following families or that use the following rootkit technologies:
- Kernel mode drivers hiding themselves, like TDL1, TDL2/TDSS, MaxSS, Srizbi, Necurs, Cutwail, etc.
- Kernel mode driver patchers/infectors, embedding malicious code into core files of an Operating System, such as TDL3, ZeroAccess, Rloader, etc.
- Master Boot Record infectors such as TDL4, Mebroot/Sinowal, MoastBoot, Yurn, Pihar, etc.
- Volume Boot Record/OS Bootstrap infectors like Cidox
- Disk Partition table infectors like SST/Alureon
- User mode patchers/infectors like ZeroAccess.
This tutorial will walk you through using Malwarebytes Anti-Rootkit to remove rootkits from your computer. It will also provide guidance on how to resolve problems that result from removing these rootkits. If you have any questions regarding this program, please feel free to ask us in the AntiVirus, Firewall and Privacy Products and Protection Methods forum.
How to use Malwarebytes Anti-Rootkit to remove Rootkits
The first step before any rootkit removal process should be to backup all of your data. Depending on the rootkit infection, Malwarebytes may make changes to your hard drives's Master Boot Record and partition table when cleaning your computer. As incorrect modification of these locations may cause your computer to not boot properly, it is always wise to perform a complete backup of all of your data before performing any rootkit removal.
Once your data has been backed up, you should then download Malwarebytes Anti-Rootkit from the following download location:

Malwarebytes Anti-Rootkit
Once Malwarebytes Anti-Malware has been started, click on the Quarantine tab. Once you click on the tab you will see all the files that have been Quarantined by Malwarebytes Anti-Rootkit.
When saving the file, please save it to your desktop. Once the file has been downloaded, right click on the downloaded file and select the Extract menu option. This will start the Windows compressed file extraction wizard. Follow the steps to extract the file and Malwarebytes Anti-Rootkit will be extracted to a folder called mbar-versionnumber on your desktop. For example, Malwarebytes Anti-Rootkit version 1.01.0.1009 will be extracted to a folder named mbar-1.01.0.1009.
Once the file has been extracted, double-click on the folder and when that folder opens, double-click on the mbar folder. You should now see a list of files that are found in the mbar folder. Please double-click on the mbar.exe file to launch the program. The icon for this program looks like:
![]()
Once you double-click on the mbar.exe file, you may receive a User Account Control prompt asking if you are sure you wish to allow the program to run. Please allow the program to run and MBAR will now start to install any necessary drivers that are required for the program to operate correctly. If a rootkit is interfering with the installation of the drivers you will see a message that states that the DDA driver was not installed and that you should reboot your computer to install it.
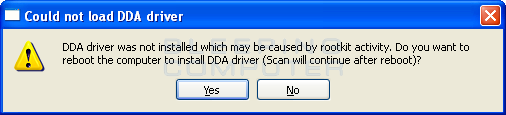
If you receive this message, please click on the Yes button and Malwarebytes Anti-Rootkit will now restart your computer. Once the computer is rebooted and you login, MBAR will automatically start and you will now be at the start screen.
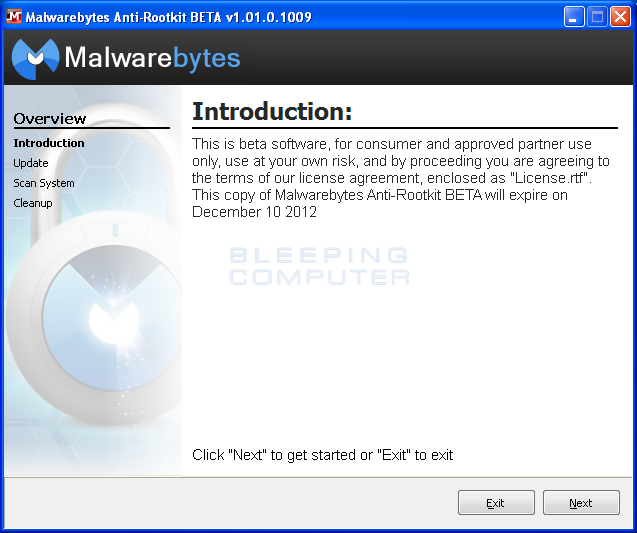
Please click on the Next button and you will then be presented with the Update Database screen.
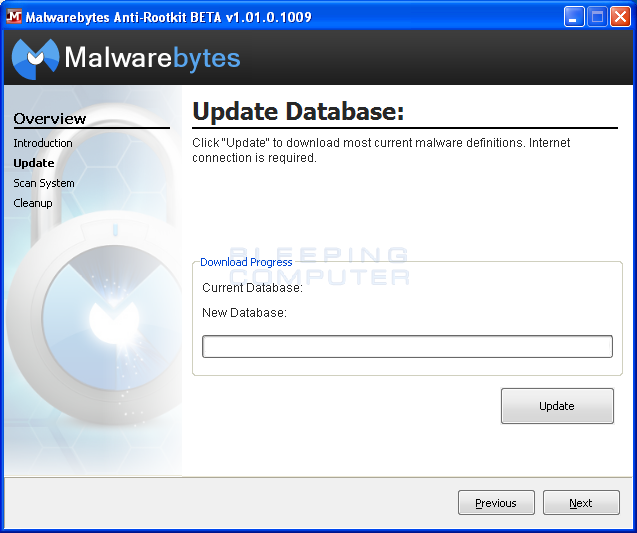
Please click on the Update button to have MBAR download the latest definition updates that will then be used when scanning your computer. When the update has finished, please click on the Next button.
You will now be at the Scan System screen where you can select some basic scanning options.
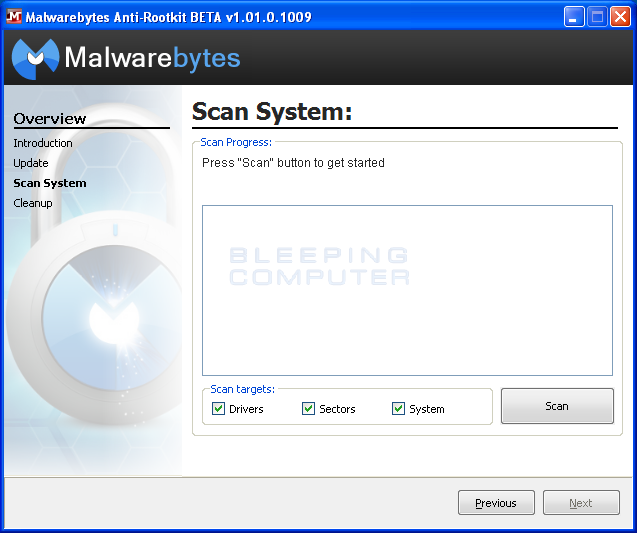
Make sure the Drivers, Sectors, and System scan targets are selected and then click on the Scan button. Malwarebytes Anti-Rootkit Scanner will now start scanning your computer for possible rootkits. This process can take some time, so please be patient. When it has finished, the program will display a screen showing you the results from the scan.
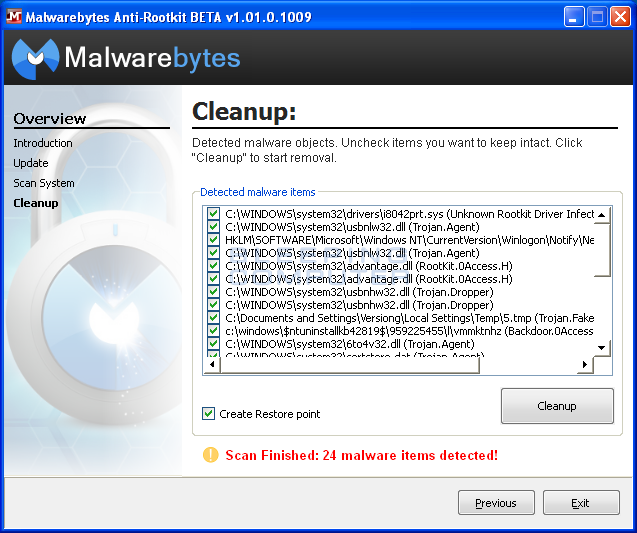
Make sure everything is selected and that there is a check mark in the Create Restore point option. Then click on the Cleanup button. Malwarebytes Anti-Rootkit will then prompt you to reboot your computer. Please click on Yes button to restart your computer.
After the computer reboots and you login, you will be back at your normal desktop. It is suggested that you do one last scan using Malwarebytes Anti-Rootkit to make sure all traces have been removed. If MBAR detects any leftovers, let it remove them and reboot again. Once you have rebooted, the detected rookits should now be removed from your computer.
There will now be two log files created in the mbar folder called system-log.txt and one that starts with mbar-log. The mbar-log file will always start with mbar-log, but the rest will be named using a timestamp indicating the time it was run. For example, mbar-log-2012-11-12 (19-13-32).txt corresponds to mbar-log-year-month-day (hour-minute-second).txt. The system-log.txt contains information about each time you have run MBAR and contains diagnostic information from the program. A new mbar-log is created every time you run MBAR and will contain information about what was detected and removed.
How to restore files that have been quarantined
When Malwarebytes Anti-Rootkit quarantines rootkit files it will place them in the same folder that Malwarebytes Anti-Malware uses for their quarantine. Unlike Malwarebytes Anti-Malware, though, MBAR does not have the ability to restore any files it has deleted. Instead, if you wish to see the files or restore them you must use Malwarebytes Anti-Malware to manage the quarantine.
To do this, you must download and install Malwarebytes Anti-Malware. You can download the program from the following link:
Malwarebytes Anti-Malware
Once Malwarebytes Anti-Malware has been started, click on the Quarantine tab. Once you click on the tab you will see all the files that have been Quarantined by Malwarebytes Anti-Rootkit.
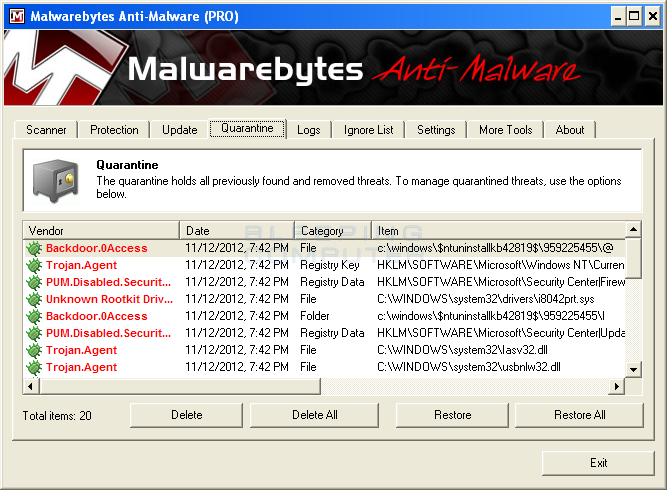
To restore a file, simply select the entries you wish to restore and click on the Restore button. When you are done restoring files, you can then close Malwarebytes Anti-Malware. It is important to note that if you restore infected files and configuration information, these infections will become active again the next time you reboot your computer. Therefore, only restore files from the quarantine that you know are 100% clean.
Advanced Command Line Arguments
Malwarebytes includes some advanced command-line arguments that you can use when starting the program. These arguments allow you to have a bit more control as to how Malwarebytes Anti-Rootkit will work on your computer. The available command line arguments are:
/h - The /h command line argument will display a help screen that displays the available command line arguments for MBAR.
/r - The /r argument tells mbar.exe to remove any MBAR drivers that are currently loaded into memory. In normal operation, Malwarebytes Anti-Rootkit should automatically remove any drivers when it has finished running. In the event that MBAR did not remove the drivers correctly you can use this command-line argument to force the removal of the drivers. Please note that these drivers are required for a scheduled cleanup on reboot to work properly. Therefore, if you remove the drivers the scheduled cleanup will be cancelled.
/u - The /u argument will tell Malwarebytes Anti-Rootkit to not unhook rootkits during its execution. The method that MBAR uses to unhook rootkits is still experimental and could cause crashes or other instability on the computer. As the functionality of MBAR is reduced when using this argument, you should only use it if MBAR causes your computer to crash.
/z - The /z argument will disable the protection driver in Malwarebytes Anti-Rootkit. When you perform a scan, MBAR normally installs Chameleon, which is a driver that protects MBAR from being detected by malware and then terminated. If you find that Chameleon is terminating programs that you require running during the scan, you should disable this feature using the /z argument.
To use a command-line argument you need to append it to the command that you use to start Malwarebytes Anti-Rootkit. This can be done by creating a shortcut to mbar.exe on your desktop, going into the shortcut's properties, and adding the argument you wish to use to the end of the command in the Target field.
The other option is enter the command using a command prompt or via the Run box. When starting MBAR using this method, you can simply add the argument to the end. For example, if MBAR is located in C:\Mbar, and you wanted to disable Chameleon you would use the follow command to start the program.
C:\mbar\mbar.exe /z
Notice how we specified the full path to the executable and just added the /z argument to the end. Also note that you must put a space between the executable name and any command line arguments you use.
Troubleshooting issues after running Malwarebytes Anti-Rootkit
Certain rootkits will delete Windows services and change Windows settings that can cause Windows not to operate properly. These problems, which typically appear after the rootkit has been removed, include loss of network connectivity, the Windows Firewall no longer starting, or Windows Update no longer working. To fix these types of issues, Malwarebytes Anti-Rootkit includes a program called fixdamage.exe that can be used to resolve many of these issues.
When run, fixdamage.exe will scan your computer for deleted or incomplete Windows services and broken Layered Service Providers. It will then recreate any missing or damaged services and repair the Layered Service Provider chain. Last, but not least, fixdamage will restore all the default Windows Firewall rules if necessary. This will typically resolve most issues with broken network connectivity and Windows services that do not start properly.
To run fixdamage, open the mbar folder that you extracted when you download the program. Inside that folder you should see a program called fixdamage.exe. Double-click on that file and the program will launch as shown below.
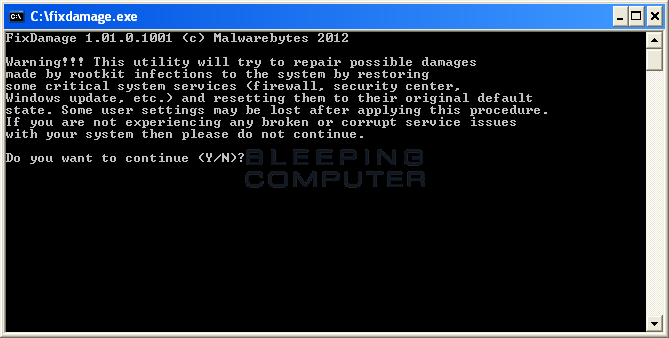
Simply press on the Y key on your keyboard and the program will perform any necessary fixes. When it has finished, you be shown a message that says press any key to exit. Press any key on your keyboard and the fixdamage screen will close. For the changes to go into effect, you now need to manually restart your computer.
Once your computer restarts and you log back in, Windows should be operating properly again.
